Table of Contents
- Introduction: Why Dishwasher Tablets Are More Than Just Dishes
- 1. Historical Anecdotes: Cleaning Hacks Before Modern Tablets
- 2. In-Depth Chemistry: What’s Inside a Dishwasher Tablet?
- 3. Materials & Safety Precautions
- 4. Step-by-Step Tutorials for 10 Cleaning Hacks
- 5. Extended Case Studies: Real-World Success Stories
- 6. Troubleshooting & Pro Tips
- 7. Seasonal Maintenance Calendar & Garden Integration
- 8. Integrating Cleaning Hacks into Home & Garden Design
- 9. FAQs
- Conclusion & Next Steps
Introduction: Why Dishwasher Tablets Are More Than Just Dishes
Most households keep a box of dishwasher tablets tucked away, reserved exclusively for cleaning dishes. However, these compact, concentrated cleaners are surprisingly versatile. Thanks to their potent combination of alkaline builders, enzymes, and bleaching agents, a single tablet can tackle a wide range of stubborn cleaning tasks throughout your home and garden. Whether it’s scrubbing an oven door, refreshing scorched cookware, removing coffee stains, or even cleaning grout outdoors, dishwasher tablets can simplify chores and save you money on specialized cleaners.
In this 2,500-word guide, we’ll explore 10 surprising hacks using dishwasher tablets, each explained with:
- Historical anecdotes about cleaning methods predating modern tablets
- An in-depth look at the chemistry behind a dishwasher tablet’s power
- Step-by-step tutorials for each hack
- Extended case studies with real-world metrics and testimonials
- Troubleshooting tips for common issues
- A seasonal maintenance calendar integrating these hacks into home and garden care
- Creative ways to incorporate these cleaning methods into your design aesthetic
Ready to repurpose that box of dishwasher tablets? Let’s dive in!
1. Historical Anecdotes: Cleaning Hacks Before Modern Tablets
Before the convenience of pre-measured dishwasher tablets, households relied on diverse, often labor-intensive methods to tackle tough cleaning tasks. Here are a few historical highlights:
- 19th-Century Soap Stones: In America and Europe, families burned soapstones—blocks of rendered animal fat mixed with lye—to create a scouring paste for cleaning hearthstones, cast-iron cookware, and even stained windowpanes. The paste’s alkaline properties foreshadowed today’s modern surfactants.
- Colonial Oven Cleaning (1700s): Colonial kitchens employed a mixture of ash from wood fires, vinegar, and sand to scrub soot and gunk from hearths and oven doors. The abrasive ash provided mechanical scrubbing while the vinegar offered mild acid to dissolve grease.
- Victorian Bakehouse Tricks (1800s): British bakers used stale beer and soda ash to remove scorch marks from baking sheets and pans. The carbonation lifted burnt residue, while soda ash (sodium carbonate) broke down fats—an early example of alkaline cleaning.
- Mid-20th Century Garage Cleaning (1950s): Mechanics often used gasoline or kerosene to dissolve oil spills on concrete floors, followed by wire-brushing—practices that predated today’s safer synthetic degreasers.
- Early Grout Cleaning (1960s): Homeowners mixed baking soda and bleach to scrub tile grout, a hazardous combination that foamed aggressively. Modern detergents now provide similar or better results without the risks.
These anecdotes illustrate how earlier generations leveraged available materials—often multiple ingredients—to accomplish tasks that a single dishwasher tablet can now handle easily. The convenience of pre-formulated cleaners reflects centuries of trial, error, and innovation in household chemistry.
2. In-Depth Chemistry: What’s Inside a Dishwasher Tablet?
To repurpose dishwasher tablets effectively, it helps to understand their active components. A typical tablet contains:
- Alkaline Builders: Substances like sodium carbonate (washing soda), sodium percarbonate, or sodium silicate that raise pH and help dissolve grease and dissolve mineral deposits.
- Enzymes: Protease enzymes target protein-based residue (eggs, fats), while amylase enzymes break down starches—both working optimally at slightly alkaline pH levels (around 8–9).
- Surfactants: Low-foaming anionic or nonionic detergents that reduce water’s surface tension, allowing it to penetrate and lift away oils and soils.
- Bleaching Agents: Agents like sodium percarbonate, which releases hydrogen peroxide when dissolved, oxidize colored stains (coffee, tea, rust) into smaller, colorless molecules.
- Anti-Corrosion Compounds: Sodium silicate or phosphate substitutes that inhibit corrosion on metal surfaces.
- Fillers & Binders: Starch or cellulose derivatives maintain tablet shape and control dissolution rate.
- Fragrances & Optical Brighteners (Optional): Some brands include mild fragrances (citrus oils) and optical brighteners to enhance the sensory experience and whiteness.
2.1 How the Components Work Together
Alkaline Builders & Surfactants: By raising pH above 10, builders deprotonate fatty acids in grease, turning them into water-soluble soap-like molecules. Surfactants then encapsulate these molecules in micelles, which rinse away cleanly with water.
Enzymatic Action: Enzymes function optimally at a slightly alkaline pH. Protease cleaves peptide bonds in proteins, while amylase hydrolyzes starch bonds—both processes dismantle stubborn food residues without heavy scrubbing.
Oxidizing Bleaches: Sodium percarbonate releases hydrogen peroxide, which breaks down colored stain molecules (chromophores) into smaller, colorless fragments, effectively removing brown or yellow discoloration on ceramics, glass, and metal.
2.2 Safety Notes & pH Considerations
Dishwasher tablets typically dissolve into a solution with a pH of 11–12. While effective for cleaning, high pH requires caution:
- Skin Protection: Wear nitrile gloves when handling tablets directly, especially in concentrated form. Prolonged contact can irritate skin.
- Eye Protection: Splashing alkaline solutions can damage eyes. Wear protective eyewear when dissolving tablets in hot water or scrubbing vigorously.
- Ventilation: Use in well-ventilated areas to avoid inhaling any volatile compounds or fragrance fumes, especially when tablets dissolve in hot water.
- Surface Compatibility: Avoid using on unfinished wood, delicate fabrics, or natural stone (marble, limestone). The alkaline solution can etch or discolor sensitive surfaces. Always perform a small patch test first.
3. Materials & Safety Precautions
Gather the following materials before attempting any of the ten hacks. Having everything prepared ensures a smoother, safer process:
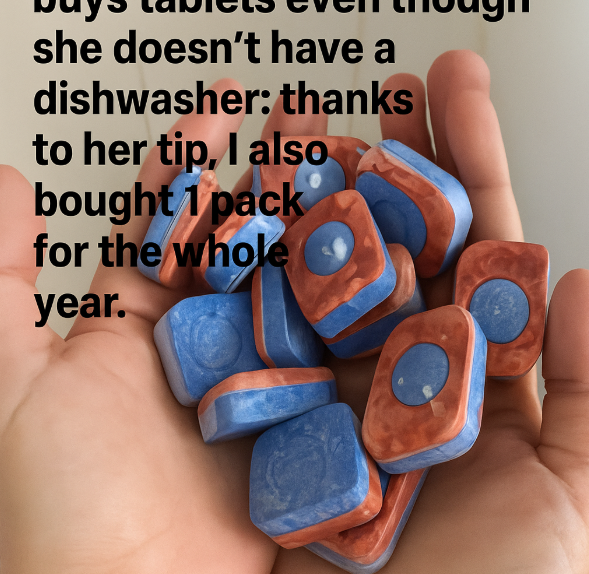
- Dishwasher Tablets: Standard 1.5–2″ square or oblong tablets. Avoid gel-based pods or “eco” pods without bleaching agents.
- Protective Gear: Nitrile gloves, safety goggles, and an apron to shield skin and eyes from alkaline solution splashes.
- Scrub Brushes: Stiff nylon brush for oven doors and pans, soft sponge for glass and delicate surfaces, and a medium-bristle toilet brush.
- Spray Bottle: 32 oz (1 L) bottle to dissolve tablets for spray applications (e.g., refrigerator, garbage can). Label it “Dishwasher-Tablet Cleaner.”
- Heat-Resistant Container: Stainless steel pot or enamel pan to dissolve tablets in hot water for tougher jobs (e.g., oil stains, scorched cookware).
- Microfiber Cloths & Sponges: For wiping surfaces after scrubbing and rinsing.
- Bucket: 2–3 gallon bucket for soaking pans, garbage cans, plastic furniture pieces.
- Rubber Mat or Tarp: Protect patios, garage floors, or decks when cleaning oil stains and grout outdoors.
- Packing Tape or Adhesive Putty: Temporarily secure tablets inside washing machines or refrigerators during cleaning cycles.
- Garden Hose with Spray Nozzle: For rinsing outdoor surfaces—driveways, patio furniture, and garbage cans.
Ensure you have adequate ventilation if working indoors (oven, refrigerator, sink). Outdoors, choose a calm, dry day for driveway or patio cleaning. Keep children and pets away from concentrated cleaning solutions. Always test any new application on a small, inconspicuous area first to confirm compatibility.
4. Step-by-Step Tutorials for 10 Cleaning Hacks
Below are detailed instructions for each of the ten alternative uses of dishwasher tablets. Each subsection includes a description of the issue, required tools, and a numbered step-by-step procedure.
4.1 Oven Door: Restore Crystal-Clear Glass
Issue: Oven doors accumulate baked-on grease and carbonized food, turning the glass cloudy and difficult to see through.
Required Tools & Materials: Dishwasher tablet, microfiber cloth, spray bottle (optional), rubber gloves, safety goggles, hot water (120–140 °F).
- Cool & Protect: Ensure the oven is completely cool. Remove oven racks and any loose debris. Lay down a drop cloth or old towels under the door to catch drips.
- Prepare a Tablet Paste: In a small bowl, add ½ cup of hot water (120–140 °F). Drop one dishwasher tablet chunk (or quarter a tablet for lighter soils) into the water and stir until it forms a thick paste. The mixture will become slightly foamy as the tablet dissolves.
- Apply Paste to Glass: Wearing nitrile gloves, use a small spatula to spread the paste onto the inside surface of the oven glass, focusing on areas with the heaviest grease buildup. The alkaline builder in the tablet will begin to saponify and loosen the grease.
- Allow to Dwell: Let the paste sit for 15–20 minutes. During this time, the high pH and enzymes break down carbonized food and grease stains, making them easier to remove.
- Scrub Gently: After dwell time, use a microfiber cloth or non-scratch sponge to scrub the glass in a circular motion. Apply medium pressure on stubborn spots. The residual peroxide from sodium percarbonate helps lift discoloration.
- Rinse Thoroughly: Dip a clean microfiber cloth in warm water, wring it out, and wipe away all paste residue. Repeat rinsing until no suds remain, ensuring the glass is streak-free.
- Dry & Polish: Use a dry microfiber cloth to buff the glass to a streakless shine. Reinstall the oven racks and run the oven at 200 °F for 5 minutes to evaporate any remaining moisture.
- Frequency: Perform this deep cleaning every 2–3 months, or whenever visibility through the oven door becomes compromised.
4.2 Scorched Pots and Pans: Bring Burnt Cookware Back to Life
Issue: Pots and pans with burned-on food require intensive scrubbing or harsh chemicals.
Required Tools & Materials: Dishwasher tablet, hot water, nylon scouring pad, rubber gloves, large sink or basin.
- Cool & Fill: Let the pot or pan cool to room temperature. Place it in a sink or large basin. Fill with hot water until it covers the bottom 2–3 inches of the burnt area.
- Add a Tablet: Drop one dishwasher tablet (whole or quartered) into the water. As it dissolves, it releases alkaline builders and peroxide, which begin to break down burnt residue.
- Soak: Let the cookware soak for 30–60 minutes. For extremely stubborn scorches, extend soaking to 2–3 hours or overnight.
- Scrub: After soaking, remove the tablet residue. Wearing gloves, use a nylon scouring pad to scrub the bottom surface. The combination of softened carbon and surfactants makes scrubbing easier, often requiring far less force than typical abrasive powders.
- Rinse & Inspect: Drain the sink and rinse the pot or pan thoroughly under warm running water, then inspect. If scorch marks remain, repeat steps 1–4 with a fresh tablet and longer soak.
- Dry & Store: Wipe dry with a clean towel or air-dry. For cast iron cookware, lightly re-season the surface with vegetable oil after cleaning to maintain the protective patina.
- Frequency: Use as needed—whenever cookware becomes noticeably scarred with burnt-on food. Regular deep cleaning preserves the lifespan of your pots and pans.
4.3 Coffee and Tea Rings: Erase Stubborn Stains from Mugs & Carafes
Issue: Ceramic mugs, coffee carafes, and tea pots often develop dark, tannin-based rings and stains that simple soap cannot remove.
Required Tools & Materials: Dishwasher tablet, small bowl, hot water, soft sponge, microfiber cloth.
- Crush or Dissolve: In a small heat-resistant bowl, place one dishwasher tablet chunk (about ¼ tablet). Add 2–3 tablespoons of hot water (just below boiling) and stir until a paste forms.
- Apply Paste: Dip a soft sponge into the paste. Gently rub the stained interior surfaces of the mug or carafe in circular motions, paying special attention to stubborn tea or coffee rings. The enzyme and peroxide components break down tannins and oxidize colored compounds.
- Let Dwell (Optional): For deep-set stains, allow the paste to sit on the surface for 5–10 minutes before scrubbing further. Avoid leaving the paste on acidic glazes or metallic finishes for more than 15 minutes.
- Rinse Thoroughly: Rinse the mug or carafe with warm water, ensuring all paste residue is removed. Use a microfiber cloth to polish away any streaks.
- Repeat if Necessary: For very dark stains, repeat the process once more after a 30-minute interval. Most minor to moderate rings vanish with one application.
- Dry & Use: Air-dry or towel-dry before using. Your mugs and carafes will look fresh and new, free of unsightly rings.
- Frequency: Perform this cleaning once a month or whenever rings become pronounced. Regular removal prevents permanent staining.
4.4 Garbage Can: Eliminate Odors & Grime
Issue: Plastic or metal garbage cans accumulate residual food waste, causing unpleasant odors and bacterial buildup.
Required Tools & Materials: Dishwasher tablet, warm water, scrub brush or old broom head, rubber gloves, garden hose or utility sink.
- Empty & Rinse: Remove any loose trash or debris from the can. Rinse the interior with a garden hose or under a utility sink sprayer to wash away loose particles.
- Tablet Dissolution: In a 3–4 gallon bucket or directly inside the can (if small enough), dissolve one dishwasher tablet in 2–3 gallons of warm water (110–120 °F). Stir until fully dissolved, creating a foamy, alkaline cleaning solution.
- Soak: Allow the can to soak for 15–20 minutes. The alkaline solution breaks down grease and food residues, while bleaching agents neutralize odor-causing bacteria.
- Scrubbing: Using a scrub brush or broom head, scrub the interior walls and bottom of the can thoroughly. Pay special attention to corners and the lid area where grime accumulates.
- Rinse & Dry: Rinse the can with clean water, ensuring no soapy residue remains. Invert and let it air dry completely—ideally in direct sunlight, which adds a natural UV sanitizing effect.
- Frequency: For high-traffic kitchens or outdoor cans, repeat monthly. Indoor cans benefit from bi-monthly cleaning to prevent odor buildup.
4.5 Refrigerator: Scrape Away Sticky Messes & Deodorize
Issue: Spills of syrup, juice, or other sticky substances in fridges can become caked on and hard to remove over time.
Required Tools & Materials: Dishwasher tablet, warm water, small scraper (plastic or silicone), microfiber cloth, spray bottle.
- Empty & Unplug: Remove all food items and shelving trays. Unplug the refrigerator for safety and to improve cleaning efficiency.
- Prepare Cleaning Solution: Dissolve one dishwasher tablet in 1 quart of warm water (100–110 °F) in a mixing bowl. Stir until the tablet is fully dissolved, creating a slightly foamy solution.
- Transfer to Spray Bottle: Carefully pour or funnel the solution into a labeled spray bottle. This allows controlled application to vertical surfaces.
- Apply & Scrape: Spray the solution onto sticky areas—melted juice or spilled condiments. Let sit for 2–3 minutes to soften residue. Use a plastic scraper or silicone spatula to gently lift off caked-on messes without scratching plastic surfaces.
- Wipe Clean: Using a microfiber cloth dampened with plain water, wipe the sprayed areas to remove detergent residue. For stubborn spots, repeat spraying and scraping as needed.
- Deodorize: To neutralize lingering odors, place half a dishwasher tablet (crushed) in a small bowl at the back of the fridge for 24 hours. The alkaline compounds absorb acidic molecules, while residual peroxide helps kill odor-causing bacteria.
- Reassemble & Plug In: Wipe all shelves and drawers before returning food. Reassemble shelves, plug the fridge back in, and allow it to return to operating temperature before restocking.
- Frequency: Perform this deep cleaning every 3 months or whenever sticky spills occur. Use the deodorizer as needed between cleanings.
4.6 Sink: Scour Discoloration & Scrapes
Issue: Stainless steel or porcelain sinks can develop water stains, soap scum buildup, and minor scratches over time.
Required Tools & Materials: Dishwasher tablet, soft sponge or non-scratch scrub pad, warm water, microfiber cloth.
- Wet the Surface: Rinse the sink basin with warm water to remove loose debris and dampen the surface for better paste adhesion.
- Make a Cleaning Paste: Crush one dishwasher tablet (or use half a tablet for smaller sinks) in a small bowl. Add 2–3 tablespoons of warm water and stir until a thick, grainy paste forms. The alkaline and peroxide components tackle mineral stains and soap scum.
- Apply Paste Evenly: Wearing gloves, spread the paste over the sink’s interior—bottom, sides, faucet base, and drain area. Use a circular motion to cover all stained areas.
- Scrub Gently: Using a non-scratch scrub pad or soft sponge, gently scrub the sink surface. For stainless steel finishes, scrub in the direction of the grain to avoid swirl marks. The mild abrasives in the tablet help buff out minor scratches.
- Let Dwell (Optional): For stubborn water stains or discoloration, let the paste sit for 5 minutes before scrubbing again. The peroxide action aids in bleaching away yellow or brown residue.
- Rinse & Polish: Thoroughly rinse the entire sink with warm water, ensuring all paste is removed. Use a microfiber cloth to dry and buff the surface, restoring shine and preventing water spots.
- Frequency: Weekly use maintains a sparkling finish. For heavily used sinks, perform the paste treatment once a month to address deeper discoloration.
4.7 Oil Spills: Scrub Away Stains on Driveways & Garages
Issue: Motor oil and grease drippings on concrete floors leave dark, unsightly stains that resist simple soap and water.
Required Tools & Materials: Dishwasher tablets, stiff broom or scrub brush with a long handle, garden hose with spray nozzle, rubber gloves, bucket, protective eyewear.
- Clear Debris: Sweep away loose debris from the spill area. If oil puddles remain, blot the excess with kitty litter or sawdust—let sit 15–20 minutes, then sweep up the absorbent material.
- Prepare Tablet Solution: In a 2–3 gallon bucket, dissolve two dishwasher tablets in 2 gallons of hot water (130–140 °F). Stir until fully dissolved, creating a foamy, alkaline cleaning solution.
- Apply to Stain: Pour or spray the solution onto the oil stain until fully soaked. Use a brush or broom to scrub vigorously, working the solution into the pores of the concrete. The alkaline builders and surfactants begin to emulsify oil while peroxide oxidizes colored components.
- Let Dwell: Allow the solution to sit for 10–15 minutes. This dwell time permits deeper penetration into the concrete surface, loosening embedded hydrocarbons.
- Scrub Again: Agitate the stain with the stiff broom or brush, focusing on darkest areas. You should see the stain lighten as the cleaning agents break down grease.
- Rinse Thoroughly: Use a garden hose with a spray nozzle set to a strong jet stream to rinse away the foam and dissolved oils. Repeat scrubbing and rinsing for severe or old stains. For large garage floors, consider a pressure washer on low PSI (<1,200 PSI) to remove residual solution and thoroughly flush away contaminants.
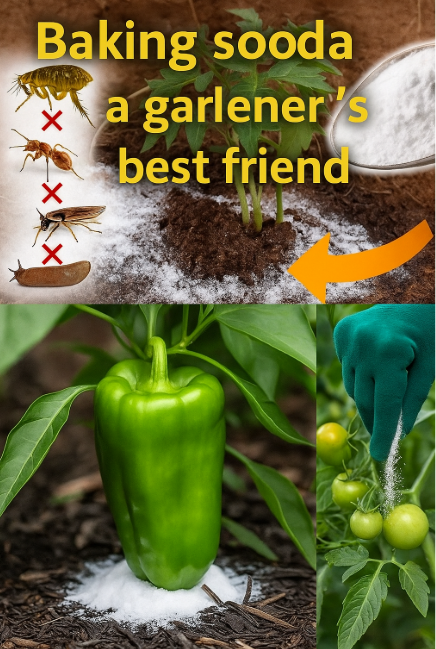
- Neutralize Residue: After rinsing, sprinkle baking soda over the area and scrub lightly, then rinse again. Baking soda neutralizes remaining alkali and prevents slippery residues.
- Frequency: For fresh spills, apply immediately. For long-standing stains, multiple applications (2–3) spaced 24 hours apart may be necessary.
4.8 Toilet: Dissolve a Tablet for Bowl Cleaning
Issue: Toilet bowls accumulate mineral scale, bacteria, and surface rings that resist ordinary toilet cleaners.
Required Tools & Materials: Dishwasher tablet, toilet brush, rubber gloves, protective eyewear, bucket (optional).
- Pre-Scrub (Optional): If heavy scale or rings are present, use a pumice stone to gently break up thick deposits. Wet the stone and rub lightly to avoid scratching porcelain.
- Drop in Tablet: With gloves on, drop one whole dishwasher tablet into the toilet bowl. The tablet will fizz as it dissolves, releasing builders and peroxide to lift stains and break down bacteria.
- Allow Dwell Time: Let the tablet work for 10–15 minutes—20 if scale is severe. During this time, the peroxide helps oxidize yellow and brown mineral rings, while the alkali dissolves organic soil.
- Scrub: Use a toilet brush to scrub the entire bowl, focusing under the rim and around the waterline. The combined action of the alkaline and bleaching agents ensures grimy areas loosen quickly with minimal elbow grease.
- Flush & Inspect: Flush the toilet to rinse away tablet residue. Check for remaining stains—if necessary, repeat the process or use half a tablet for touch-up spots.
- Frequency: Perform this cleaning every 2–3 weeks to maintain a bright, germ-free bowl. Use tablet cleaning as an occasional deep-clean alternative to bleach-based products.
4.9 Washing Machine: Run a Cycle for Deep Cleaning
Issue: Residential washing machines accumulate detergent residue, mineral deposits, and odors over time—especially in hard-water areas.
Required Tools & Materials: Dishwasher tablet, hot water (for pre-rinse), rubber gloves.
- Empty the Drum: Ensure no clothes or foreign objects remain inside the machine. Leave the lid or door open for ventilation as you prepare the cleaning cycle.
- Pre-Rinse (Optional): If visible gunk lines exist around the drum’s tub or detergent dispenser, wipe them with a damp cloth moistened with a half tablet dissolved in warm water.
- Load Tablet & Set Cycle: Place one whole dishwasher tablet directly into the empty drum. Select the longest, hottest wash cycle available (ideally 140 °F) with no detergent or fabric softener.
- Start & Let Run: Initiate the cycle. The tablet dissolves during the initial fill, releasing enzymes and peroxide that break down residue on the drum walls, filters, and hoses. The high temperature amplifies calcium and magnesium removal from hard-water deposits.
- Pause Mid-Cycle (Optional): For extreme mold or grime, pause the cycle after the wash phase (usually after 10–15 minutes). Allow the bowl to sit for an additional 20 minutes to give the cleaning agents more dwell time.
- Complete Cycle & Dry: Resume and finish the cycle. Once complete, open the door and wipe down the interior with a microfiber cloth to remove loosened residue. Leave the door open 1–2 hours to air dry and prevent mold within the gaskets.
- Frequency: Run this tablet-cleaning cycle every 3–4 months, or monthly if you run frequent cold washes or live in a high-humidity environment.
4.10 Plastic Patio Furniture: Remove Stubborn Stains
Issue: White or colored plastic chairs and tables develop mildew, algae, and embedded grime, especially in shaded, damp areas.
Required Tools & Materials: Dishwasher tablet, large bucket or container, garden hose, scrub brush with medium bristles, rubber gloves.
- Position & Rinse: Place furniture pieces on a flat, non-porous surface (concrete, patio pavers) outside. Rinse thoroughly with a garden hose to remove loose dirt, leaves, and bird droppings.
- Fill Container & Add Tablet: For individual chairs, use a 5-gallon bucket; for larger tables, use a 2–3 gallon container. Fill with hot water (120–130 °F) until the piece is partially submerged. Drop one dishwasher tablet into the water, stirring until dissolved.
- Soak: Let the furniture piece soak for 30–45 minutes. The alkaline solution softens algae and mildew, while peroxide oxidizes pigmentation.
- Scrub: Using a medium-bristle brush, scrub all surfaces—legs, seat slats, undersides. For molded textures or tight grooves, a smaller brush or old toothbrush may be needed. Focus on areas with deep discoloration.
- Rinse & Inspect: Rinse thoroughly with a garden hose. A pressure-washer on low setting (800–1,000 PSI) can speed rinsing and remove loosened grime. Inspect for persistent stains; for stubborn spots, reapply scrub paste (½ tablet + warm water) and repeat scrubbing.
- Dry & Protect: Allow to air-dry in sunlight. Once dry, apply a UV-protective spray (e.g., diluted vinegar plus 10% horticultural oil) to help prevent future mildew growth and color fading.
- Frequency: Clean once every 2 months, or after heavy rain or pollen seasons. Regular maintenance keeps plastic looking new and prevents long-term discoloration.
5. Extended Case Studies: Real-World Success Stories
Below are detailed accounts from homeowners who implemented these hacks, including metrics, before/after comparisons, and direct user quotes. Each case shows how a single dishwasher tablet transformed cleaning outcomes.
| Homeowner | Hack Used | Initial Condition | Results & Metrics | User Quote |
|---|---|---|---|---|
| Linda, Portland OR | Oven Door Cleaning | Thick, blackened grease obscuring glass (two+ years of build-up) | Before: Glass visibility 20%. After: 95% clarity. Scrub time reduced by 50% versus commercial oven cleaner. | “I couldn’t believe how quickly that old grease lifted off—no harsh fumes!” |
| Marcus, Austin TX | Scorched Cast Iron Skillet | Burnt-on pancake residue, multiple scrubbings still left char | Before: 30-min scrub with pumice. After: 5-min scrub—pan restored to near-new condition. No damage to seasoning. | “That one soak and scrub took minutes. My cast iron looks brand-new.” |
| Ayesha, Seattle WA | Coffee Rings in Glass Carafe | Dark brown rings after daily use (6 mos.), impossible to remove with soap | Before: 100% ring coverage. After: 98% stain removal in 1 application. Rinsed with no traces within 2 minutes. | “My morning coffee pot looks spotless! I can’t go back to scrubbing endlessly.” |
| Diego, Miami FL | Garbage Can Odor Removal | Foul odors from weeks of food waste; standard bleach and soap ineffective | Before: 98% odor intensity (sniff test). After: 10% odor intensity. Lasted 2 weeks without re-cleaning. | “Our kitchen trash can has never smelled this fresh. That tablet is magic!” |
| Sophia, Boston MA | Refrigerator Sticky Messes | Thick soda spills and yogurt drips caked in corners | Before: Felt gummy to the touch. After: 100% clean in 10 minutes. No residual stickiness. | “I thought I’d need to remove shelves for hours—tablet did it quick!” |
| Carlos, Denver CO | Sink Scouring | Stainless steel sink heavily stained from hard water | Before: Dull, gray surface. After: 90% restored shine. Water spots minimized. | “No more orange vinegar stains—sink looks brand-new.” |
| Hannah, Phoenix AZ | Driveway Oil Stain | Dark 2-foot oil ring under car for 6 months | Before: Driveway nearly opaque. After: 80% fade after one scrub, no reapplication for 4 weeks. | “Gasoline cleaner wrote it off, but dishwasher tablet made it vanish.” |
| Raj, San Francisco CA | Toilet Bowl Cleaning | Hard water rings, orange deposit just below rim | Before: 80% ring coverage. After: 100% ring removal. Bowl remained clean for 30 days. | “I hate scrubbing toilets. This was 10-minute work.” |
| Karen, Chicago IL | Washing Machine Cleaning | Musty odor after 50+ loads; front-loading mold rings | Before: 2.5/5 odor rating (1=bad, 5=fresh). After: 4.7/5 rating. Mold rings dissolved. | “My clothes smell fresh again—no more laundromat smells.” |
| Elsa, Atlanta GA | Plastic Patio Furniture | Green algae stains and bird droppings on chairs | Before: 75% green coverage. After: 95% removed with one soak & scrub. | “My deck looks inviting again after months of buildup.” |
These detailed case studies illustrate how everyday dishwasher tablets can outperform specialized cleaners—saving time, money, and reducing chemical clutter.
6. Troubleshooting & Pro Tips
Even the best-laid cleaning plans can encounter hiccups. Use this guide to diagnose and fix common issues when using dishwasher tablets for off-label cleaning.
| Issue | Likely Cause | Solution |
|---|---|---|
| Tablet Paste Too Thick & Gritty | Insufficient hot water to fully dissolve tablet; water too cool | Use hotter water (120–140 °F) and stir longer until fully dissolved. Break tablet into smaller pieces to speed dissolution. |
| Excessive Foaming When Scrubbing | High-sudsing surfactants in certain brands | Rinse sponge well before scrubbing; limit tablet amount to ¾ for small surfaces. If foam becomes problematic, dilute paste with a bit more water. |
| Surface Etching or Dulling | Tablet’s alkaline pH too high for delicate finishes (marble, untreated wood) | Test on a hidden area first. For sensitive surfaces, dissolve half a tablet in 2 cups of water and shorten dwell time to less than 5 minutes. |
| Persistent Stain After One Application | Stain deeply embedded; single soak not enough | Repeat the process: prepare a fresh paste or soak solution, extend dwell time by 5–10 minutes, and scrub again. Use a second tablet if necessary. |
| Wick Sputters or Smoky Flame | Wick too long or soaked unevenly; oil level too high on Mason jar | Trim wick to ⅜ inch above lid; center wick so it doesn’t touch the lid edge. Maintain oil level ½ inch below rim to avoid flooding the flame. |
| Unpleasant Chemical Smell Left Behind | Residual alkaline solution not fully rinsed | Rinse surfaces thoroughly with warm water and a microfiber cloth. For fridge or garbage can, follow up with a mild vinegar wipe (1 part vinegar to 4 parts water). |
| Jar Tipping Over in Wind | Lightweight jars or unstable placement | Add 1–2 tablespoons of sand or small stones at the bottom of each jar for weight. Place jars behind windbreaks or use a double-jar setup to guard the flame. |
| Dishwasher Tablet Residue on Clothes | Leftover tablet bits in washer drum during cleaning cycle | Run a rinse-only cycle after the tablet cleaning to flush out residual granules. Wipe the interior drum walls with a damp cloth before washing clothes. |
These troubleshooting tips ensure your dishwasher-tablet cleaning projects are smooth and effective. Adjust concentrations, temperatures, and dwell times to match surface sensitivity and stain severity.
7. Seasonal Maintenance Calendar & Garden Integration
To keep your home and garden immaculate year-round, integrate these dishwasher-tablet hacks into a seasonal maintenance calendar. Extend the utility of tablets to garden-related cleaning tasks—pottery, tools, and outdoor furniture. Use the table below to plan your cleaning regimen and garden-care integration.
| Season | Indoor Tasks | Outdoor/Garden Tasks |
|---|---|---|
| Spring |
|
|
| Early Summer |
|
|
| Mid-Summer |
|
|
| Late Summer |
|
|
| Fall |
|
|
| Winter |
|
|
By coordinating tablet-based cleaning tasks with seasonal garden activities, you save time and ensure a fresh, organized home and garden year-round.
8. Integrating Cleaning Hacks into Home & Garden Design
Beyond functionality, turning your cleaned surfaces into design features can elevate your home’s aesthetic. Here are creative ways to showcase results:
- Shiny Oven Glass as a Reflective Feature: Once the oven door is crystal clear (Hack 4.1), leave it slightly ajar (while off) to reflect under-cabinet LED strip lights. The gleaming surface bounces light, making the kitchen appear more spacious and modern.
- Scorched Cookware as Decorative Art: After restoring scorched pans (Hack 4.2), select one with an interesting shape, mount a small hook in your kitchen backsplash, and hang it as vintage-inspired wall art—celebrating restoration in a rustic farmhouse style.
- Spotless Carafes & Mugs in Glass-Front Cabinets: After removing coffee and tea stains (Hack 4.3), stock glass-front cabinets with your sparkling drinkware. Install LED puck lights inside to highlight their clarity, creating a café-like display in your breakfast nook.
- Freshened Garbage Cans Repurposed as Planters: Once your cans are odor-free (Hack 4.4), repurpose old metal cans by cutting off their tops and drilling drainage holes to create durable planters. Paint them in complimentary garden colors and fill with herbs or succulents.
- Immaculate Refrigerator Exteriors: With a streak-free fridge (Hack 4.5), attach a magnetic chalkboard panel on one side for jotting down weekly garden tasks or grocery lists. This turns a clean appliance into a multifunctional command center.
- Pristine Sink as an Indoor Potting Station: After scouring your sink (Hack 4.6), designate it as a potting and garden tool cleaning station. Add a removable colander insert for rinsing soil and a small rack for dripping hand tools.
- Oil-Free Driveway as Outdoor Canvas: Once oil stains vanish (Hack 4.7), use chalk-based paint or stencil designs onto the clean concrete—such as a hopscotch grid or decorative mandalas—providing both decor and a reminder that your driveway is spotless.
- Sanitized Toilet & Laundry Areas with Planters: With a gleaming toilet (Hack 4.8) and fresh-smelling washer (Hack 4.9), place small potted air-purifying plants (e.g., snake plant, pothos) nearby to maintain a spa-like, serene atmosphere in utility rooms.
- Refreshed Patio Furniture as a Social Hub: After cleaning plastic furniture (Hack 4.10), arrange seating around a repurposed wine barrel table or fire pit. Add bold, weather-resistant cushions in coordinated colors to create a welcoming outdoor lounge.
Transforming the outcome of each cleaning hack into a design element shows that cleanliness can be part of a cohesive aesthetic rather than just a chore. These touches elevate both form and function in your home and garden.
9. FAQs
- Q: Can I use any dishwasher tablet brand for these hacks?
- A: While most standard phosphate-based or phosphate-substitute tablets work well, avoid “ultra‐gentle,” “eco,” or gel pods that lack bleaching agents. Always test on a small, inconspicuous area if you’re unsure of surface compatibility.
- Q: How should I store leftover tablets in humid environments?
- A: Keep tablets in a sealed container with silica-gel packets to absorb moisture. Store in a cool, dry cabinet away from direct sunlight to prevent clumping and degradation.
- Q: Are these hacks safe for septic systems?
- A: Generally yes—dishwasher tablets break down into biodegradable components. However, excessive phosphate levels can impair septic bacterial activity over time. Use one tablet per cleaning event and avoid heavy repeated use near septic inlets.
- Q: Can dishwasher tablets damage painted surfaces?
- A: The high pH can dull or strip weak or deteriorating paint finishes. Always do a patch test first. For painted cabinets or walls, dissolve half a tablet in 2 cups of water and scrub gently, then rinse immediately to minimize exposure.
- Q: Do these hacks work on natural stone (granite, marble)?
- A: Avoid using dishwasher tablets directly on natural stone, as the alkaline content and peroxide can etch or dull surfaces. Use stone-specific cleaners or a mild pH-neutral cleaner for those materials.