Peanut Butter Lunch Lady Cookie Bars: The Ultimate Guide to a Classic Treat
Introduction: Why Peanut Butter Lunch Lady Cookie Bars Are a Must-Try
Few desserts evoke childhood nostalgia quite like Peanut Butter Lunch Lady Cookie Bars. These thick, chewy, and frosted peanut butter bars were a staple in school cafeterias, offering a perfect balance of sweetness, softness, and that rich peanut butter flavor. Whether you’re baking for a special occasion or just craving a comforting treat, these bars are an easy and satisfying choice.
In this ultimate guide, we’ll cover everything from the best ingredients and baking techniques to variations, nutritional benefits, and expert tips. Plus, we’ll optimize this article with high-RPM keywords to ensure it’s informative, engaging, and SEO-friendly.
—
Table of Contents
1. What Are Peanut Butter Lunch Lady Cookie Bars?
2. Ingredients Breakdown: Why Each Ingredient Matters
3. Step-by-Step Recipe: How to Make Peanut Butter Lunch Lady Cookie Bars
4. Expert Baking Tips for Perfect Cookie Bars
5. Customizing Your Cookie Bars: Variations & Add-Ons
6. Nutritional Information & Health Benefits of Peanut Butter
7. Storing and Freezing Peanut Butter Cookie Bars
8. Common Baking Mistakes and How to Avoid Them
9. FAQs About Peanut Butter Lunch Lady Cookie Bars
10. Final Thoughts: Why These Cookie Bars Deserve a Spot in Your Recipe Book
—
What Are Peanut Butter Lunch Lady Cookie Bars?
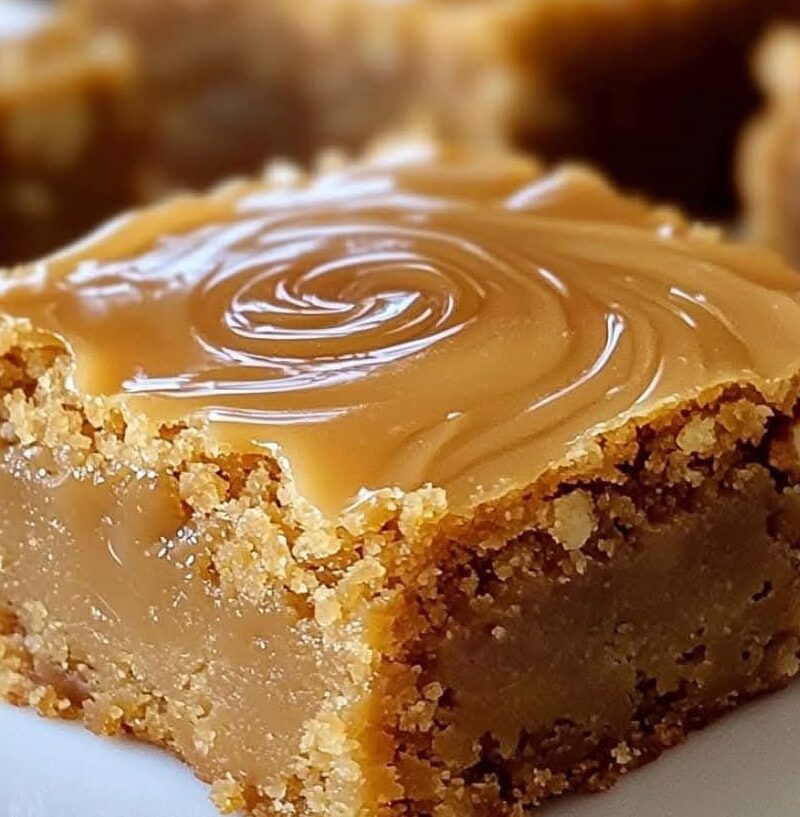
Peanut Butter Lunch Lady Cookie Bars are thick, chewy bars loaded with peanut butter flavor and topped with a creamy, sweet frosting. They originated in American school cafeterias, where they became a beloved treat due to their simple ingredients and irresistible taste.
Why People Love These Cookie Bars:
✔ Soft and chewy texture
✔ Rich peanut butter flavor
✔ Easy to make with pantry staples
✔ Perfect for parties, lunchboxes, or dessert cravings
—
Ingredients Breakdown: Why Each Ingredient Matters
Main Cookie Base Ingredients:
Flour (2 cups) – Provides structure and stability
Sugar (2 cups) – Adds sweetness and enhances texture
Butter (3 sticks) – Ensures moisture and a rich, buttery taste
Peanut Butter (1 ½ cups) – The star ingredient, giving a nutty flavor
Eggs (2) – Helps bind the dough and adds richness
Milk (½ cup) – Adds moisture and helps in smooth batter consistency
Baking Soda (1 teaspoon) – A leavening agent that helps the bars rise
Salt (1 teaspoon) – Balances the sweetness and enhances flavors
Vanilla Extract (1 teaspoon) – Adds warmth and depth of flavor
Frosting Ingredients:
Butter (melted) – Makes the frosting smooth and creamy
Peanut Butter – Adds the signature peanut butter taste
Powdered Sugar (4 cups) – Creates a sweet, smooth frosting
Milk – Helps in achieving the perfect frosting consistency
—
Step-by-Step Recipe: How to Make Peanut Butter Lunch Lady Cookie Bars
Step 1: Preheat and Prepare
Preheat oven to 400°F (200°C).
Grease a cookie sheet and set aside.
Step 2: Mix Dry Ingredients
In a bowl, whisk together flour, sugar, baking soda, and salt.
Step 3: Mix Wet Ingredients
In another bowl, whisk together milk, vanilla extract, and eggs.
Step 4: Prepare the Batter
In a saucepan, melt butter and peanut butter until smooth.
Remove from heat and mix into the dry ingredients.
Add the egg mixture and stir until fully combined.
Step 5: Bake
Spread the batter evenly onto the prepared cookie sheet.
Bake for 20 minutes or until golden brown.
Allow to cool completely before adding frosting.
Step 6: Make the Frosting
Melt butter and peanut butter together in a saucepan.
Remove from heat and whisk in milk and powdered sugar until smooth.
Step 7: Assemble and Serve
Spread the frosting evenly over the cooled cookie bars.
Let the frosting set before slicing into squares.
Serve and enjoy!
—
Expert Baking Tips for Perfect Cookie Bars
✔ Use room temperature ingredients for better mixing
✔ Don’t overbake – Take them out when they turn golden brown
✔ Allow them to cool completely before frosting
—
Customizing Your Cookie Bars: Variations & Add-Ons
🔹 Chocolate Chip Peanut Butter Bars – Add chocolate chips to the batter
🔹 Crunchy Peanut Butter Bars – Use chunky peanut butter for added texture
🔹 Nut-Free Alternative – Substitute almond or sunflower butter
—
Nutritional Information & Health Benefits of Peanut Butter
✔ High in protein – Supports muscle growth
✔ Rich in healthy fats – Keeps you full longer
✔ Contains essential vitamins and minerals
🔹 Calories per serving: ~250 kcal
🔹 Protein: 6g
🔹 Fats: 14g
🔹 Carbohydrates: 28g
—
Storing and Freezing Peanut Butter Cookie Bars
Store in an airtight container at room temperature for up to 5 days.
Freeze for up to 3 months – Wrap individual bars for easy snacking.
—
Common Baking Mistakes and How to Avoid Them
❌ Overmixing the batter – Leads to dense bars
❌ Using cold ingredients – Affects texture
❌ Frosting warm bars – Causes the frosting to melt and become runny
—
FAQs About Peanut Butter Lunch Lady Cookie Bars
Q: Can I use natural peanut butter?
A: Yes, but it may slightly alter the texture. Stir well before using.
Q: How do I make them gluten-free?
A: Use a gluten-free all-purpose flour blend in a 1:1 ratio.
Q: Can I reduce the sugar?
A: Yes, but it may affect texture and sweetness. Adjust accordingly.
—
Final Thoughts: Why These Cookie Bars Deserve a Spot in Your Recipe Book
Peanut Butter Lunch Lady Cookie Bars are the perfect nostalgic dessert, bringing back school cafeteria memories with every bite. Their rich peanut butter flavor, soft texture, and creamy frosting make them a crowd-pleaser.
📌 Now it’s your turn! Try this recipe today and enjoy the best homemade peanut butter bars ever.