Butterfinger Balls: The No-Bake Treat Everyone Will Beg You to Make
Introduction: The Ultimate No-Bake Dessert for Every Occasion
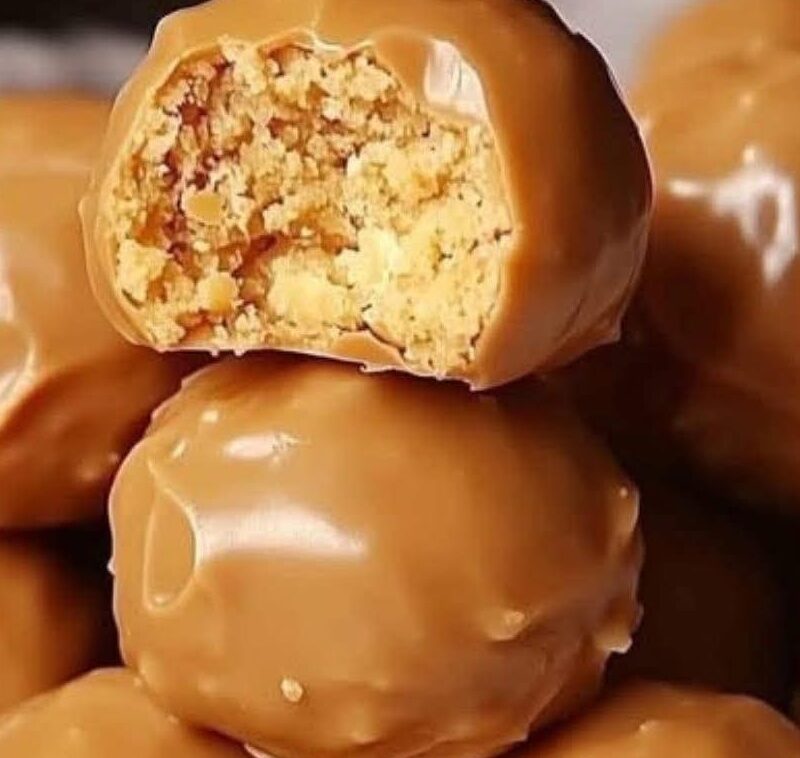
In the world of desserts, few things hit the sweet spot like a perfectly chewy, crunchy, chocolatey bite. That’s exactly what you get with Butterfinger Balls—a nostalgic, no-bake treat made with creamy peanut butter, powdered sugar, and the unmistakable crunch of Butterfinger candy.
Whether you’re prepping for the holidays, throwing a birthday bash, making a sweet gift, or simply craving a quick indulgence, these bite-sized balls check all the boxes. They’re easy to make, impossible to resist, and ideal for parties, lunchboxes, or freezing for later.
In this guide, we’ll walk you through everything you need to know about making Butterfinger Balls from scratch. You’ll get:
A foolproof base recipe
Ingredient breakdown and alternatives
Fun mix-ins and flavor twists
Make-ahead and freezer tips
Nutritional info
Common FAQs
And a few creative ways to serve and enjoy these little bites of happiness
Let’s dive into your next go-to dessert recipe.
—
Ingredients: What You’ll Need and Why It Works
The beauty of Butterfinger Balls lies in their simplicity. With just a handful of pantry staples, you can create something that tastes like it came from a candy shop.
Basic Ingredients:
1 cup creamy peanut butter
The base of the recipe. Peanut butter provides the smooth, nutty flavor and helps bind everything together. Avoid natural peanut butter if you want a firmer texture.
½ cup unsalted butter, softened
Adds creaminess and richness. Using unsalted butter helps control the overall flavor.
1 teaspoon vanilla extract
A touch of vanilla enhances the sweetness and rounds out the flavors.
1 cup powdered sugar
Sweetens the mixture and helps firm up the texture.
Crushed Butterfinger candy (optional but recommended)
Mix into the base or roll the finished balls in it for that signature crunch.
> Optional Additions:
Chocolate chips or chunks
Crushed pretzels
Graham cracker crumbs
Mini marshmallows
—
How to Make Butterfinger Balls: Step-by-Step Instructions
Step 1: Mix the Base
In a medium-sized mixing bowl, combine:
1 cup creamy peanut butter
½ cup softened butter
1 teaspoon vanilla extract
Mix until smooth and creamy using a spoon or hand mixer.
Step 2: Add the Sugar
Gradually stir in:
1 cup powdered sugar
Mix well until a thick, dough-like consistency forms. If the mixture is too soft, you can add a little more powdered sugar or refrigerate it for 10 minutes before shaping.
> Optional: Fold in ½ cup crushed Butterfinger pieces for extra crunch.
Step 3: Roll Into Balls
Scoop the dough using a tablespoon or small cookie scoop. Roll between your palms into 1-inch balls and place them on a parchment-lined tray.
Step 4: Chill
Place the tray in the refrigerator for at least 30 minutes to firm up the balls. You can also freeze them for faster results.
Step 5: Coat or Dip (Optional)
Once chilled, roll the balls in:
Crushed Butterfinger candy
Cocoa powder
Powdered sugar
Dip in melted chocolate and allow to set for 15 minutes
Step 6: Serve and Enjoy
Serve chilled or at room temperature. These bites are creamy, crunchy, sweet, and satisfying!
—
Why You’ll Love Butterfinger Balls
No baking required
Takes less than 20 minutes to make
Kid-friendly and fun to make together
Perfect for holidays, potlucks, and parties
Budget-friendly ingredients
Can be made ahead and frozen
—
Flavor Variations and Fun Add-Ins
Once you’ve mastered the base, try these creative variations:
Chocolate-Covered Butterfinger Balls
Dip each chilled ball in melted milk, dark, or white chocolate. Let set on parchment paper for a candy-like coating.
Nut-Free Version
Substitute peanut butter with sunflower seed butter or cookie butter for allergy-friendly alternatives.
Crunchy Version
Add ½ cup Rice Krispies or chopped pretzels to the dough for extra texture.
Cookie Dough Inspired
Mix in mini chocolate chips and a pinch of salt for a cookie dough-style Butterfinger bite.
Holiday Twist
Roll in festive sprinkles or red and green sanding sugar for Christmas, or use colored candy melts to dip.
—
Serving Ideas: Sweeten Up Any Spread
Butterfinger Balls can be served so many ways:
On a dessert board with cookies and candies
In decorative tins as holiday gifts
With a side of hot cocoa or coffee
On top of ice cream or cupcakes as edible garnish
In cupcake liners for a party tray
As part of a “no-bake bites” trio with truffles and cookie balls
—
Make-Ahead, Storage & Freezing Tips
Make-Ahead
You can prepare the dough ahead and refrigerate for up to 3 days before rolling into balls.
Storage
Store in an airtight container in the fridge for up to 1 week. Best enjoyed cold.
Freezing
Freeze finished Butterfinger Balls in a single layer, then transfer to a freezer-safe container or zip-top bag. They’ll keep for up to 2 months.
> To serve: Let thaw at room temperature for 15–20 minutes before eating.
—
Nutrition Breakdown (Approximate per 1 ball)
Calories: ~120
Total Fat: 9g
Protein: 2g
Carbohydrates: 9g
Sugar: 6g
Fiber: 1g
> Note: Values vary based on exact ingredients and coatings used.
—
Frequently Asked Questions
Can I use natural peanut butter?
It’s not recommended unless it’s a no-stir variety. Natural peanut butter can make the mixture too runny and hard to form into balls.
Can I dip these in chocolate?
Absolutely! Use melted chocolate chips or candy melts. Place dipped balls on parchment paper and refrigerate to set.
Can I make these with kids?
Yes! This is a perfect no-bake recipe for kids to help with. They’ll love rolling the dough and decorating.
Can I use margarine instead of butter?
Yes, but real butter gives the best flavor and texture.
How do I keep the mixture from sticking to my hands?
Lightly coat your palms with powdered sugar or spray with a bit of nonstick spray while rolling.
—
Conclusion: One Recipe, Endless Sweet Possibilities
Butterfinger Balls are everything we love about homemade sweets—simple, nostalgic, no-fuss, and totally addictive. Whether you’re a beginner in the kitchen or a seasoned baker who needs a fast treat, this recipe delivers every single time.
With just a few basic ingredients and no baking required, you’ll have a tray of sweet, peanut-buttery bliss ready in minutes. They’re freezer-friendly, kid-approved, and endlessly customizable—what more could you ask for?
—
Call to Action: Try It, Share It, Save It
If you make these Butterfinger Balls, let us know how they turned out!
Share a photo on social media and tag us
Save this recipe on Pinterest
Send it to a friend who loves peanut butter treats
And don’t forget to subscribe for more no-bake dessert ideas!
—
Suggested Hashtags for Social Media Sharing