Hatching chicken eggs at home can be a fun and rewarding experience, especially if you create your own incubator. With the right materials and careful monitoring, you can successfully hatch chicks without needing expensive equipment. This guide will take you through a step-by-step process to build a homemade egg incubator, ensuring high hatch rates and healthy chicks.
Why Hatch Chicken Eggs at Home?
Hatching eggs at home offers multiple benefits:
✅ Cost-Effective: A DIY incubator is much cheaper than buying a commercial one.
✅ Educational: A great learning experience for kids and beginners.
✅ Control Over Conditions: You can monitor and adjust temperature and humidity for better success rates.
✅ Sustainability: Raise your own chickens for eggs, meat, or as pets.
Materials Needed for a DIY Incubator
Before getting started, gather the following materials:
✔ A sturdy cardboard box (or a plastic container)
✔ A light bulb with socket and electrical cord
✔ A thermometer and hygrometer (to monitor temperature and humidity)
✔ Sawdust or shredded paper (for bedding and insulation)
✔ A small water container (to regulate humidity)
✔ Fertilized eggs (from a reliable farm or your own hens)
Step-by-Step Process: How to Make a DIY Egg Incubator
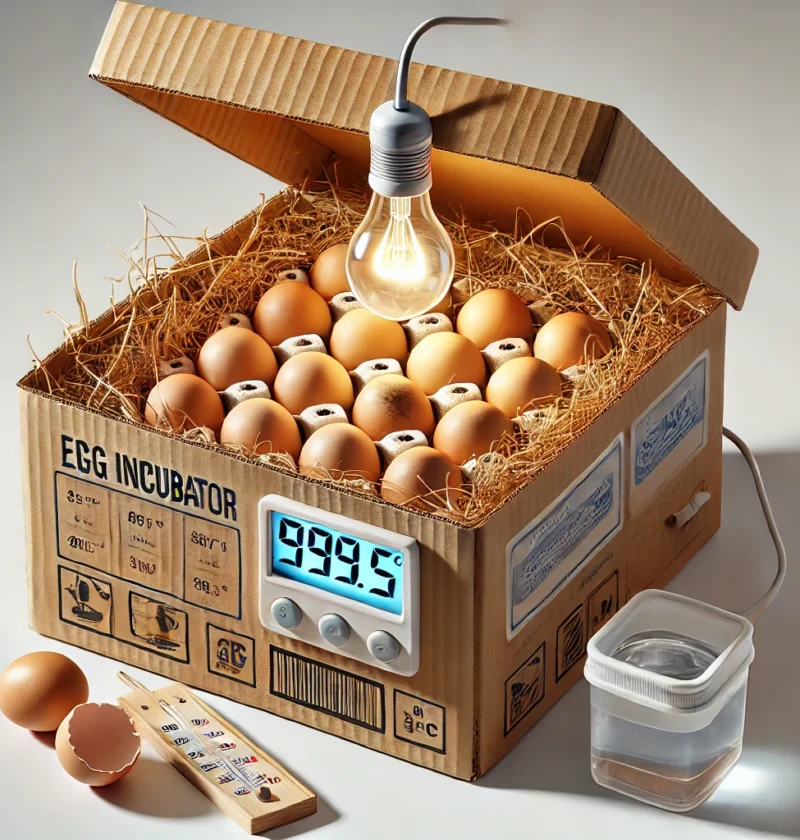
Step 1: Prepare the Box
🔹 Choose a well-ventilated cardboard or plastic box large enough to hold your eggs.
🔹 Line the bottom with sawdust or shredded paper to help insulate and maintain warmth.
🔹 Cut small ventilation holes on the sides to ensure fresh air circulation.
Step 2: Install the Heat Source
🔹 Attach a 40–60W incandescent light bulb to the center or side of the box.
🔹 Ensure that the bulb provides even heat distribution without overheating the eggs.
🔹 If possible, use a thermostat to regulate the temperature and prevent fluctuations.
Step 3: Monitor Temperature and Humidity
🔹 Place a thermometer and hygrometer inside the box to maintain optimal conditions:
✔ Temperature: 99.5°F (37.5°C)
✔ Humidity: 50-60% during the incubation period
🔹 Keep a small container of water inside the incubator to maintain humidity levels.
Step 4: Place the Eggs in the Incubator
🔹 Arrange fertilized eggs inside the incubator with enough space for air circulation.
🔹 Pointed ends should face down, while the rounded side faces up.
Step 5: Turn the Eggs Regularly
🔹 Rotate the eggs 2-3 times daily to prevent the embryo from sticking to the shell.
🔹 Mark the eggs with an “X” on one side and an “O” on the other to track turning.
🔹 Stop turning the eggs on day 18 to allow proper chick positioning before hatching.
Step 6: Increase Humidity Before Hatching
🔹 On day 18, increase humidity to 65-70% by adding extra water to the incubator.
🔹 Do not open the incubator too often to prevent heat and moisture loss.
Step 7: Hatch Day (21 Days)
🔹 Around day 21, chicks will start pipping (cracking the shell) and hatching!
🔹 Allow chicks to emerge on their own—do not rush the process.
🔹 Once hatched, let the chicks dry off inside the incubator before moving them to a brooder.
Common Mistakes to Avoid
🚫 Inconsistent Temperature: Sudden drops or spikes can harm embryos.
🚫 Low Humidity Levels: Can cause dry membranes, making it difficult for chicks to hatch.
🚫 Not Turning Eggs Enough: Can lead to embryo deformities or weak chicks.
🚫 Opening the Incubator Too Often: Causes heat and moisture loss, delaying hatching.
Caring for Newborn Chicks 🐥
✔ Transfer chicks to a warm brooder (90-95°F for the first week).
✔ Provide clean water and chick starter feed.
✔ Reduce heat gradually as they grow.
✔ Keep the brooder clean and dry to prevent infections.
Conclusion: Start Hatching Your Own Chicks!
Creating a homemade egg incubator is a fun and affordable way to hatch healthy baby chicks. By carefully controlling temperature, humidity, and egg rotation, you can increase hatch rates and enjoy the rewarding experience of raising your own chickens.
🚀 Start your DIY hatching project today and enjoy farm-fresh eggs from your backyard flock!
📌 Did you find this guide helpful? Share it with other chicken enthusiasts! 🐣🐥