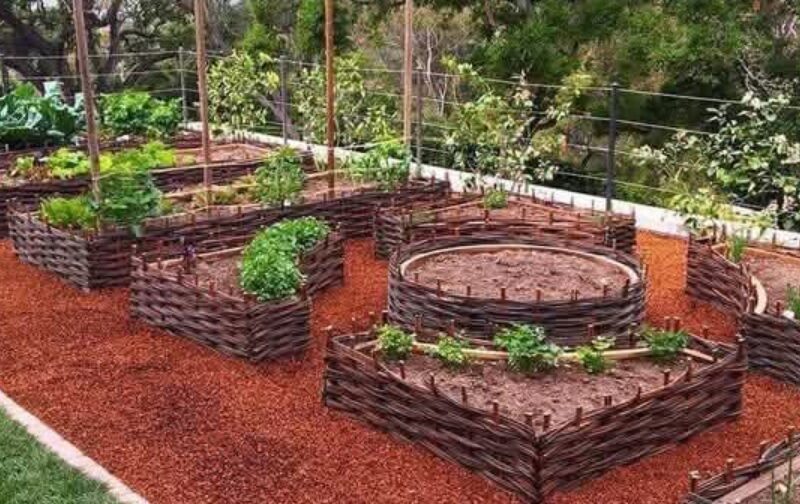
If you’re looking for a rustic, eco-friendly, and visually appealing way to enhance your garden, a wattle raised garden bed is the perfect solution! This centuries-old technique uses natural, woven branches to create a durable and organic garden bed that blends beautifully into any outdoor space.
Follow this step-by-step guide to build your own wattle raised garden bed using sustainable materials and traditional weaving techniques!
—
🌱 Why Choose a Wattle Raised Bed?
✔ Eco-Friendly – Made from renewable, biodegradable materials
✔ Aesthetic Appeal – Adds a rustic, natural charm to any garden
✔ Customizable – Can be built in any size or shape
✔ Affordable – Uses locally sourced branches instead of store-bought materials
✔ Durable & Functional – Provides strong, breathable support for plants
—
🛠️ Materials Needed
1. Natural Building Materials
✅ Long, flexible branches (willow, hazel, dogwood, alder, or young saplings)
✅ Short, sturdy stakes (hardwood like oak or cedar, at least 1-inch thick)
2. Tools & Reinforcements
✅ Pruners or a handsaw (for cutting branches)
✅ Hammer or mallet (to drive stakes into the ground)
✅ Twine or wire (optional, for extra reinforcement)
3. Filling & Planting Materials
✅ Cardboard or newspaper (to suppress weeds at the base)
✅ Compost and organic matter (for healthy soil)
✅ Plants or seeds (vegetables, herbs, or flowers)
—
🔨 Step-by-Step Instructions
Step 1: Plan Your Wattle Bed
Decide on the size, shape, and location of your raised bed.
Standard raised beds are typically 3-4 feet wide and 1-2 feet tall, allowing for easy access from all sides.
✔ Tip: A circular or rectangular shape works best for structural stability.
—
Step 2: Gather Your Materials
Harvest or collect long, flexible branches and sturdy stakes.
Cut branches into manageable lengths, ideally 3-5 feet long for weaving.
If using fresh-cut branches, let them dry for a few days to improve flexibility.
✔ Tip: Willow is one of the best weaving materials due to its natural flexibility.
—
Step 3: Prepare the Site
Clear the ground of grass and weeds.
Level the area where you’ll build your wattle bed.
✔ Tip: Placing a layer of cardboard or newspaper at the base can help prevent weeds from growing inside the bed.
—
Step 4: Install the Stakes
Drive the sturdy stakes into the ground 1-2 feet apart along the bed’s perimeter.
Leave at least 6-12 inches of the stake above ground—this will support the woven branches.
Ensure the stakes are evenly spaced and firmly anchored.
✔ Tip: The tighter the spacing, the stronger the structure will be!
—
Step 5: Start Weaving the Branches
Take long, flexible branches and weave them in and out of the stakes.
Alternate weaving direction on each row to improve strength.
Press branches down firmly to keep them compact and tight.
✔ Tip: If a branch is too stiff, soak it in water for a few hours to improve flexibility.
—
Step 6: Build Up to Desired Height
Continue weaving layer by layer until you reach your desired bed height.
Tuck in any loose ends and secure with twine or small nails if necessary.
✔ Tip: A minimum height of 12 inches is ideal for proper root growth and drainage.
—
Step 7: Reinforce the Structure (Optional)
If the wattle walls seem loose, tie twine or wire around them for added stability.
You can also trim any excess branches for a neat, clean look.
✔ Tip: A small layer of mulch along the outer base can help retain moisture and further stabilize the structure.
—
Step 8: Fill the Bed with Soil & Compost
Line the bottom with cardboard or newspaper to suppress weeds.
Add layers of organic compost, garden soil, and mulch to create a nutrient-rich environment.
✔ Tip: Use a lasagna gardening method—layering organic material like leaves, manure, and compost—to build rich, fertile soil.
—
Step 9: Plant Your Garden
Choose vegetables, herbs, or flowers that suit your climate and space.
Arrange plants based on sunlight needs and spacing requirements.
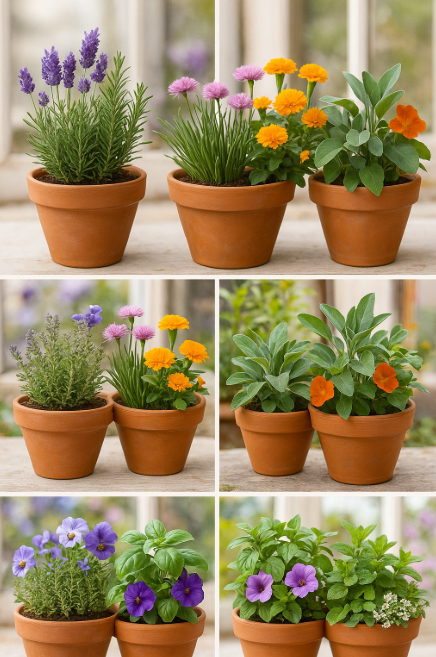
✔ Best Plants for Wattle Beds:
🌿 Herbs (basil, rosemary, thyme)
🥕 Vegetables (lettuce, carrots, tomatoes)
🌸 Flowers (marigolds, lavender, nasturtiums)
—
Step 10: Maintain Your Wattle Raised Bed
Check for loose branches and reinforce if needed.
Replace weaving branches annually for long-term durability.
Water plants regularly, especially in hot weather.
Replenish soil with compost every season for healthy growth.
✔ Tip: Over time, wattle walls will naturally weather and blend into the landscape, creating a charming rustic look!
—
🌿 The Benefits of a Wattle Raised Bed
🌱 Sustainable & Eco-Friendly
Uses natural, renewable materials instead of synthetic borders.
Biodegrades over time, returning nutrients to the soil.
🌼 Beautiful & Rustic
Blends seamlessly into any garden setting.
Can be shaped into circles, rectangles, or unique artistic designs.
🛠️ Durable & Long-Lasting
With proper maintenance, wattle beds can last 3-5 years before needing repairs.
Naturally breathable—promotes healthy soil and plant roots.
🔄 Fully Customizable
Adjust size, height, and shape to suit your space and gardening needs.
Can be built as a single raised bed or multiple beds for a larger garden.
—
🌻 Final Thoughts
Building a wattle raised garden bed is a rewarding, sustainable, and budget-friendly way to grow your own food while connecting with nature.
Whether you’re a beginner gardener or an experienced homesteader, this traditional weaving method will add beauty, function, and sustainability to your outdoor space.