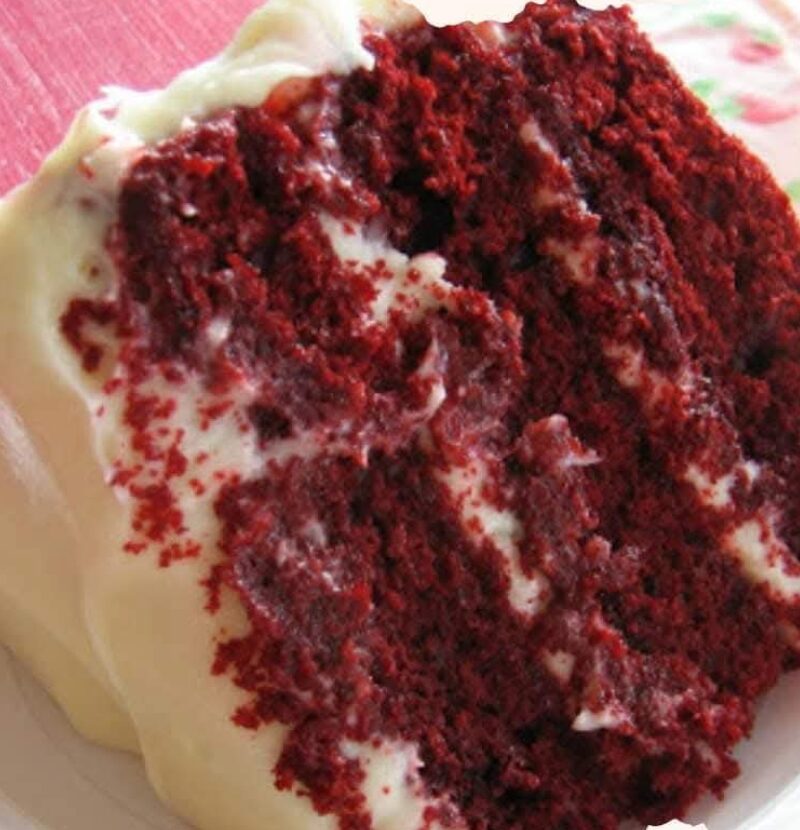
The Ultimate Red Velvet Cake: A Rich History, Tips, and Creative Variations
Introduction
Red velvet cake is more than just a dessert; it’s an iconic treat celebrated for its rich history, velvety texture, and striking color. From its humble beginnings in the early 20th century to becoming a global favorite, this cake holds a special place in the hearts of dessert lovers. This extended guide will dive deep into the history, provide expert tips, suggest creative variations, and share the detailed recipe to help you create the perfect red velvet cake.
—
The History of Red Velvet Cake
Red velvet cake’s origin is steeped in mystery and culinary evolution. Some historians trace it back to the Victorian era, where it was popular to add cocoa to cakes for a softer, “velvety” texture. Others suggest it gained popularity in the 1920s, thanks to the Adams Extract Company, which used it to market red food coloring.
During the Great Depression, the cake became a symbol of affordable luxury, as its vibrant red hue could be achieved with simple pantry ingredients like vinegar and buttermilk. The rise of red velvet cake in the U.S. can also be attributed to the Waldorf-Astoria Hotel in New York, which claimed to serve the original version. Today, it’s a staple for celebrations, from birthdays to weddings.
—
Ingredients Breakdown: The Science Behind the Cake
Understanding the purpose of each ingredient is key to mastering red velvet cake:
1. Flour: Provides the structure. Sifting ensures a light and fluffy texture.
2. Cocoa: Adds a subtle chocolate flavor. The combination with buttermilk and vinegar enhances the red color.
3. Eggs: Bind the ingredients and add richness.
4. Butter: Ensures a moist and tender crumb.
5. Buttermilk: Reacts with baking soda and vinegar, contributing to the cake’s soft texture and tangy flavor.
6. Red Food Coloring: Delivers the signature vibrant red color.
7. Vinegar: Aids in the chemical reaction for fluffiness and enhances the color.
8. Baking Powder and Baking Soda: Essential leavening agents for the perfect rise.
9. Vanilla Extract: Adds depth and warmth to the flavor.
—
Step-by-Step Recipe Instructions
Cake Ingredients
2 1/4 cups of sifted flour
3 large eggs
1 1/2 cups of butter
1 1/2 cups of buttermilk
2 cups of sugar
3 bottles of red food coloring
1 tablespoon of cocoa
1 tsp of salt
1 tsp of vinegar
1 tsp of baking soda
2 tsp of baking powder
1 tsp of vanilla
Frosting Ingredients
4 cups of powdered sugar
1 1/2 cups of butter
1 tsp of vanilla extract
8 ounces of cream cheese
1/2 cup of nuts (optional)
—
Instructions: How to Bake the Perfect Cake
1. Prepare the Batter:
Preheat your oven to 350°F (175°C). Grease and flour three 9-inch cake pans.
In a large mixing bowl, cream the butter and sugar until light and fluffy. Add the eggs, one at a time, beating well after each addition.
Stir in the cocoa, red food coloring, and vanilla extract.
2. Combine Dry and Wet Ingredients:
In a separate bowl, sift together the flour, salt, and baking powder. Gradually add this dry mixture to the wet ingredients, alternating with buttermilk. Start and end with the dry ingredients to avoid overmixing.
In a small bowl, combine the vinegar and baking soda, then quickly fold it into the batter. The reaction will help the cake rise beautifully.
3. Bake:
Divide the batter evenly among the prepared pans. Bake for 25–30 minutes or until a toothpick inserted in the center comes out clean.
Allow the cakes to cool in the pans for 10 minutes before transferring them to a wire rack to cool completely.
4. Make the Frosting:
Beat the butter and cream cheese together until smooth. Gradually add the powdered sugar, mixing until fluffy.
Stir in the vanilla extract and fold in the nuts if desired.
5. Assemble the Cake:
Place one cake layer on a serving plate and spread frosting evenly over the top. Repeat with the remaining layers. Frost the sides and top of the cake, smoothing with a spatula. Decorate as desired.
—
Tips for a Perfect Red Velvet Cake
1. Use High-Quality Ingredients: Fresh butter, real vanilla extract, and quality cocoa make a big difference.
2. Measure Accurately: Baking is a science; even slight variations can affect the texture.
3. Don’t Overmix: Overmixing can result in a dense cake. Stop as soon as the ingredients are combined.
4. Room Temperature Ingredients: Ensure all your ingredients are at room temperature for a smooth batter.
5. Chill the Cake Layers: Chilling the layers before frosting prevents crumbs from mixing into the frosting.
—
Creative Variations
1. Cupcakes: Turn the batter into cupcakes for individual servings. Adjust the baking time to 18–20 minutes.
2. Chocolate Velvet: Double the cocoa for a richer chocolate flavor.
3. Layered Cheesecake: Alternate layers of red velvet cake with creamy cheesecake for a decadent twist.
4. Gluten-Free: Replace the all-purpose flour with a gluten-free baking mix.
5. Holiday-Themed: Use green food coloring for St. Patrick’s Day or red and blue layers for the Fourth of July.
—
The Backstory: Why Red Velvet Is a Family Favorite
For many, red velvet cake isn’t just a dessert; it’s a tradition. Families often have their own version passed down through generations, with secret ingredients or special techniques. Its vibrant red color makes it a showstopper at any gathering, symbolizing love, celebration, and indulgence.
—
Final Thoughts
Red velvet cake is more than just a beautiful dessert. It’s a delightful blend of flavors, textures, and history that continues to capture hearts worldwide. Whether you’re making it for a birthday, wedding, or simply as a treat, this recipe guarantees a show-stopping cake that tastes as amazing as it looks. So gather your ingredients, follow these tips, and enjoy the journey of creating the ultimate red velvet cake.
Bon Appétit!


